
Why Passport Photos Matter for Retail Margins
Passport photos fill counter gaps between shipping runs while converting walk-in traffic into revenue. Understanding the most common passport photo rejection reasons helps your staff prevent costly reshoot cycles and build customer loyalty through first-try compliance.
The State Department regularly rejects passport photos that fail to meet its submission standards.
The State Department rejects between 15 and 20 percent of passport photos submitted each year, leaving customers frustrated and scrambling to find another provider. Most walk-ins won’t return to the retailer who got it wrong the first time.
Independent retailers—photo studios, pharmacies, shipping centers, and print shops—can step into this gap. Mastering passport photo requirements compliance turns a one-time transaction into a trusted service that generates high-margin recurring revenue from repeat customers who value getting it right the first time.
Mastering compliance standards positions
When you consistently deliver compliant passport photos, customers stop treating your store as a backup option. They return specifically for your expertise, refer friends navigating the same process, and trust you with other services.
The 12 Common Rejection Reasons
The State Department consistently flags the same twelve compliance failures when reviewing passport photo submissions. These rejection reasons fall into five distinct categories:
- Background issues
- Lighting problems
- Expression errors
- Positioning mistakes
- Technical specification failures
Each category represents a specific, correctable problem that trained staff can identify and prevent before the customer submits their application.
Understanding this framework allows retailers to train employees efficiently and communicate clearly with customers about why a previous photo failed and how your store will get it right. When your team masters these common passport photo mistakes. You offer a premium service: compliant-on-first-try photos that save customers the frustration of resubmissions and wasted time. This expertise builds confidence in your store’s passport photo capabilities and transforms a basic service into a professional consultation that customers value and pay for.
Background Compliance Standards
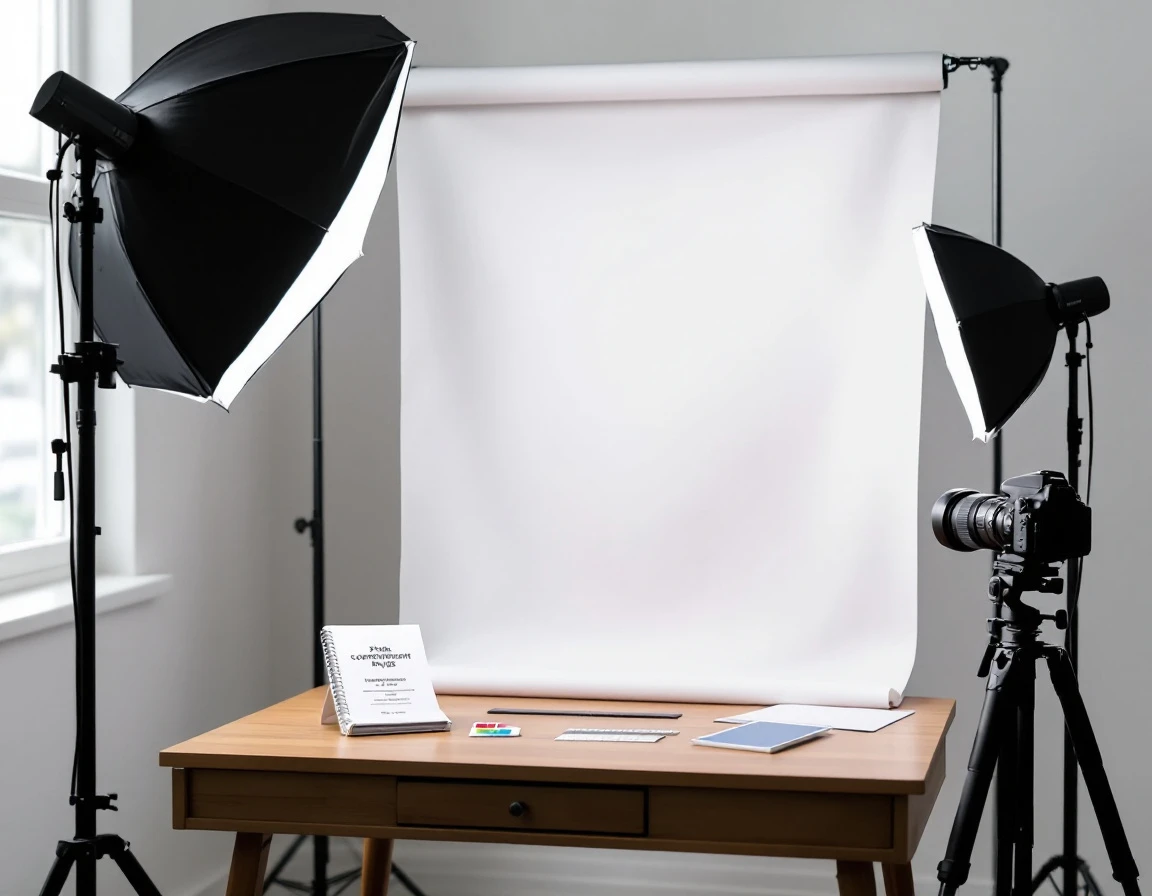
The State Department requires a white or off-white background with no patterns, shadows, or colored tones visible behind the subject. This single requirement generates more rejections than any other element of passport photo compliance. A backdrop that looks “close enough” to white — a light blue wall, a beige curtain, or cream-colored paper — fails inspection and triggers a reshoot cycle that costs you time and erodes customer confidence.
Three specific background problems drive rejections:
- Incorrect background color — backdrops that appear blue, gray, tan, or any shade other than pure white violate the uniform background standard in 22 CFR 51.28
- Uneven lighting or shadows — window light casting a shadow on the backdrop or overhead fixtures creating a gradient from top to bottom — creates visual inconsistency that automated compliance systems flag immediately
- Distracting elements or wrinkles — a visible shelf edge, picture frame, door trim, or creased paper behind the subject’s head — introduces background content that pulls focus from the applicant’s face
Retailers can audit their current setup in five minutes. Stand where customers will be photographed and look at what appears behind head height. Uupgrade with affordable solutions: white wrinkle-free paper on a backdrop stand eliminates wrinkles and color inconsistency, while soft lighting rigs positioned at 45-degree angles prevent harsh shadows and hotspots.
Train staff with a pre-shot checklist: confirm backdrop is pure white, check for shadows cast by the subject or lighting, scan the frame for visible objects or creases, and verify even illumination across the entire background. Retailers who master background compliance eliminate the most common rejection reason, reducing reshoot costs and turning reliable first-try success into a competitive advantage that brings customers back for every passport renewal.
Lighting and Exposure Control
Harsh shadows, uneven facial lighting, and glare are the second most common category of State Department rejections. The rules demand soft, frontal lighting that illuminates facial features evenly without creating shadows under the nose, chin, or cheekbones. Retailers who master passport photo background lighting positioning eliminate a major rejection category while building customer confidence in their technical expertise.
Four lighting failures trigger rejections: shadows on the face, glare or shine on foreheads and glasses, overexposure that washes out facial features, and underexposure that leaves details in darkness. Each stems from a correctable mistake. Shadows appear when subjects stand backlit near windows or under overhead fixtures without diffusion. Glare happens when camera flash hits glasses directly or when bright lights bounce off oily skin. Overexposure results from flash settings too bright for the distance, while underexposure occurs in dim rooms where ambient light falls short.
A simple three-point lighting rig solves most problems. Position your main light at a forty-five-degree angle to the subject’s face, add a fill light on the opposite side to soften shadows, and place a backlight behind the subject to separate them from the background. Ring lights and softbox kits cost less than processing three disputed rejections, and diffusers eliminate the harsh reflections that plague overhead fluorescent fixtures.
Staff training tip: Before releasing the shutter, check the live preview screen for hot spots on the forehead and glasses reflections. After capturing the image, zoom in on the screen to confirm eye color is visible and facial features show clear detail. Proper lighting is the fastest operational win for reducing rejections and building repeat passport photo business.
Expression and Head Positioning Rules
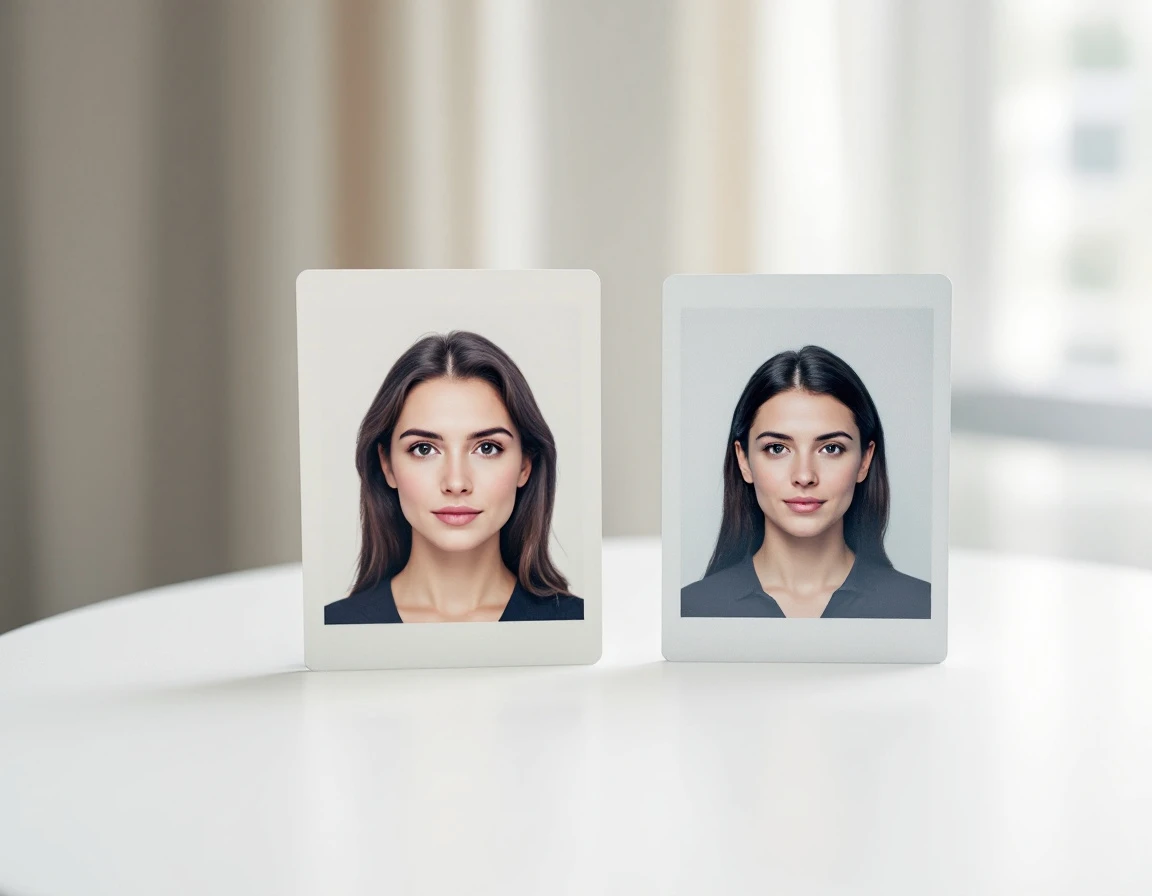
The State Department requires a neutral facial expression with mouth closed and no smile—one of the most counterintuitive rules for customers who assume passport photos work like portraits. You’ll hear daily objections: “But I always smile for photos,” or “I look angry if I don’t smile.” This resistance creates friction unless your staff can explain the reason clearly and position customers with confidence.
The rule exists because facial recognition software analyzes bone structure and features, which change when someone smiles or tilts their head. Head positioning is equally strict: the head must be upright and centered, with both ears partially visible, chin level, and eyes looking directly at the camera. A head tilted even five degrees to the side, chin angled downward from habit, or eyes glancing down from shyness triggers rejection.
Train your staff with a simple script: “Passport photos use facial recognition software, so we need your head straight and your expression neutral. Look directly at the lens, keep your chin level, and relax your mouth closed. I’ll check the preview to make sure we’re compliant before we print.” Walk customers through a quick positioning check—ears visible on both sides, shoulders square, eyes open and forward—then show them the preview screen to confirm alignment before printing.
Retailers who train staff to position customers correctly on the first attempt eliminate one of the most common rejection categories and build trust. Customers appreciate the guidance when they understand the technical reason, and they return when they need compliant photos for visas, licenses, or other documents.

Photo Specifications and Technical Requirements
The State Department’s automated scanning system rejects photos with incorrect file formats, wrong dimensions, insufficient resolution, or incorrect color profiles—even when the customer’s face looks perfect. Image files must be JPEG format, 600×600 pixels minimum, 1200×1200 pixels maximum, sRGB color profile, and under 240 KB file size. Head size matters too: the measurement from chin to crown must occupy 50-70% of the vertical frame. Photos older than six months violate recency requirements and trigger rejections.
Many failures happen after the shot itself—during cropping, resizing, or file export. A staff member who crops too tightly or saves in PNG format hands the customer a photo that looks fine but fails automated verification. Eyeglass glare from lenses worn during the session creates another technical rejection, even when the customer’s eyes are visible.
Create a pre-submission checklist your team runs before printing: verify file size and format, measure head-to-frame ratio onscreen, confirm the photo was taken today, check the color profile in your editing software, and inspect for glare on eyeglasses. Retailers who verify specs before handing photos to customers avoid the awkwardness of failed applications and build trust that brings customers back for future document services.
Staff Training and Quality Control Checklist
A simple checklist transforms passport photo service from guesswork into a repeatable process. Staff who follow a pre-capture and post-capture workflow eliminate 80 percent of rejection causes before the shutter ever clicks. The checklist consolidates all twelve State Department rejection reasons into visual checkboxes: background color and evenness, lighting uniformity, neutral expression with eyes fully open, head positioning with ears visible, and technical specifications including dimensions and file format.
Introduce this checklist to your team as a quality guarantee. When customers watch staff follow a rigorous process—adjusting the background, checking the preview screen, guiding head position—they trust the outcome. For the most common customer question, train staff to say: “The State Department uses facial recognition software that requires a neutral expression with your mouth closed. This helps border security systems match your photo to your face.” This script explains the rule without sounding like a refusal.
The business case is clear. Retailers who implement this checklist can confidently market “State Department certified” passport photos, justify premium pricing over drugstore kiosks, and turn occasional rejections into reshoot service revenue. Mastering the twelve rejection reasons creates a repeatable process that builds customer loyalty and predictable revenue—customers return because they know your store delivers compliant photos on the first attempt.
Converting Rejections Into Upsell Opportunities
A customer who walks into your store holding a rejected passport photo from a pharmacy chain or online service is frustrated—and ready to pay for a solution that works. This is your highest-value walk-in traffic. They’ve already wasted time and money, and they need a compliant photo now. Position your store as the rescue option by understanding why passport photo rejected submissions happen and offering three premium services:
- Offer a rush reshoot with a compliance guarantee at premium pricing. While a standard passport photo might cost fifteen to twenty dollars, charge twenty-five to forty dollars for same-day service with a written guarantee that the photo meets all twelve State Department requirements. Explain that you’re not just taking a photo—you’re certifying it won’t be rejected.
- Provide digital passport photo services for retail customers whose existing photos have minor compliance issues. Background cleanup, lighting correction, and color profile conversion often fix DIY photos without requiring a reshoot. Charge fifteen to thirty dollars for these edits, which carry margins between fifty and seventy percent—far higher than the thirty to forty percent margin on standard photo shoots.
- Train your staff to confidently explain why the competitor photo failed using the twelve rejection categories. When customers understand that their rejected photo had uneven background lighting or incorrect head positioning, they trust your expertise and become repeat clients who skip the DIY experiment next time.